Unity初心者のマルチプレイゲーム制作格闘記の第三弾です。
今回は敵となるオブジェクトが一定間隔で生成されるようにして、一番近くのプレイヤーを付け狙うようにしてみたいと思います!参考動画にはなく、間違いがあれば都度追記・修正していきます…!
前回は下のリンクから是非!
敵の準備
プレハブの作成
早速、敵となるオブジェクトを作成していきます。ヒエラルキーウィンドウから「Cube」の3Dオブジェクトを作成し、必要となる下記のコンポーネントを追加・設定していきます。
・Box Collider
・RigidBody
・LinkedEntityGroupAuthoring(自動で追加されます)
・GhostAuthoringComponent
「Enemy」に名称を変更し、プレハブ化しておきました。

オーサリング
エネミーで使用するコンポーネント軍とオーサリングのスクリプトを作成しました。
using Unity.Entities;
using Unity.Mathematics;
using Unity.NetCode;
using UnityEngine;

/// <summary>
/// エネミー認識タグ
/// </summary>
public struct EnemyTag : IComponentData { }

/// <summary>
/// 新規エネミー初期化用タグ
/// </summary>
public struct NewEnemyTag : IComponentData { }

/// <summary>
/// エネミーが向かっていく場所
/// </summary>
public struct TargetPosition : IComponentData
{
    [GhostField] public float3 position;
}

public class EnemyAuthoring : MonoBehaviour
{
    public int HP;
    public float MoveSpeed;

    public class Baker : Baker<EnemyAuthoring>
    {
        public override void Bake(EnemyAuthoring enemyAuthoring)
        {
            var entity = GetEntity(TransformUsageFlags.Dynamic);
            AddComponent<EnemyTag>(entity);
            AddComponent<NewEnemyTag>(entity);
            AddComponent(entity, new TargetPosition
            {
                position = float3.zero,
            });
            AddComponent(entity, new CommonStatus
            {
                MaxHP = enemyAuthoring.HP,
                HP = enemyAuthoring.HP,
                MoveSpeed = enemyAuthoring.MoveSpeed,
            });
        }
    }
}
※後の戦闘システムの実装のことを考えて、「PlayerAuthoring」にあったPlayerStatusをCommonStatusに変更し、MaxHPのフィールドを追加しています。
/// <summary>
/// プレイヤー、エネミーなどの共通ステータス
/// </summary>
public struct CommonStatus : IComponentData
{
    public int MaxHP;
    [GhostField] public int HP;
    [GhostField] public float MoveSpeed;
}
忘れずに、先ほど作成した敵のプレハブにアタッチして、初期値を入れておきます。

PrefabContainerにオーサリング
プレイヤーのエンティティを置いている「PrefabContainer」へ一緒にエネミーのエンティティも置いておきます。そのために「EnemyPrefabsAuthoring」を作成しました。
※数種類の敵を実装することを考えてEnemy1だったり複数形だったりしますが、後で訂正するかもしれません。
using Unity.Entities;
using UnityEngine;

public struct EnemyPrefabs : IComponentData
{
    public Entity Enemy1;
}

class EnemyPrefabsAuthoring : MonoBehaviour
{
    public GameObject Enemy;

    public class Baker : Baker<EnemyPrefabsAuthoring>
    {
        public override void Bake(EnemyPrefabsAuthoring authoring)
        {
            var entity = GetEntity(TransformUsageFlags.None);
            AddComponent(entity, new EnemyPrefabs
            {
                Enemy1 = GetEntity(authoring.Enemy, TransformUsageFlags.Dynamic)
            });
        }
    }
}
「PrefabContainer」にアタッチし、先ほどの敵のプレハブをインスペクターから設定します。

敵の生成と初期化
一定間隔で敵を生成
サーバーのTickを利用して、1秒に1回敵を生成する「EnemySpawnSystem」を作成しました。敵の生成はサーバーで管理したいので、サーバーのみで処理します。
using Unity.Burst;
using Unity.Collections;
using Unity.Entities;
using Unity.Mathematics;
using Unity.NetCode;
using Unity.Transforms;

[WorldSystemFilter(WorldSystemFilterFlags.ServerSimulation)]
[BurstCompile]
public partial struct EnemySpawnSystem : ISystem
{
    private Random _random;
    private NetworkTick _startTick;
    private int _simulationTickRate;

    public void OnCreate(ref SystemState state)
    {
        state.RequireForUpdate<EnemyPrefabs>();
        state.RequireForUpdate<NetworkTime>();
        // とりあえずシード値は100固定でランダム生成
        _random = new Random(100);
        // NetCodeConfigからレートを取得
        _simulationTickRate = NetCodeConfig.Global.ClientServerTickRate.SimulationTickRate;
    }

    [BurstCompile]
    public void OnUpdate(ref SystemState state)
    {
        var networkTime = SystemAPI.GetSingleton<NetworkTime>();

        // サーバー開始時にTickをフィールドに保持
        if (!_startTick.IsValid)
        {
            _startTick = networkTime.ServerTick;
            return;
        }

        // サーバー開始時と現在のTickの差
        var elapsedTick = networkTime.ServerTick.TicksSince(_startTick);
        // 1秒に1回敵を生成する、それ以外は早期リターン
        if(elapsedTick % _simulationTickRate != 0) return;

        var ecb = new EntityCommandBuffer(Allocator.Temp);
        // 生成する敵のエンティティを取得して生成
        var enemy1Entity = SystemAPI.GetSingleton<EnemyPrefabs>().Enemy1;
        var spawnEntity = ecb.Instantiate(enemy1Entity);

        ecb.SetName(spawnEntity, "Enemy1");
        var spawnPosition = new float3(_random.NextFloat(-10f, 10f), _random.NextFloat(-10f, 10f), 0f);
        var newTransform = LocalTransform.FromPosition(spawnPosition);
        ecb.SetComponent(spawnEntity, newTransform);

        ecb.Playback(state.EntityManager);
        // EntityCommandBuffer(Allocator.Temp)はメモリリークする可能性があるため最後に解放
        ecb.Dispose();
    }
}
ここで#1で作成した「NetCodeConfig」からサーバーでの1秒当たりのTick回数を取得しています。
下図のSimulationTickRateのことで、現状は1秒間に60回処理されてるということかな?

初期化処理
プレイヤーと同じように、物理挙動の設定を行う「InitializeEnemySystem」を作成しました。(これってプレハブのインスペクターとかから設定できないのかな…?)
using Unity.Collections;
using Unity.Entities;
using Unity.Physics;

[UpdateInGroup(typeof(SimulationSystemGroup), OrderFirst = true)]
public partial struct InitializeEnemySystem : ISystem
{
    public void OnUpdate(ref SystemState state)
    {
        var ecb = new EntityCommandBuffer(Allocator.Temp);
        foreach (var (physicsMass, physicsVelocity, newEnemyEntity) in SystemAPI.Query<RefRW<PhysicsMass>, RefRW<PhysicsVelocity>>().WithAny<NewEnemyTag>().WithEntityAccess())
        {
            // 物理演算による回転の無効化:[0], [1], [2] はそれぞれ X, Y, Z 軸
            physicsMass.ValueRW.InverseInertia[0] = 0;
            physicsMass.ValueRW.InverseInertia[1] = 0;
            physicsMass.ValueRW.InverseInertia[2] = 0;

            // 繰り返さないようにNewEnemyTagは削除
            ecb.RemoveComponent<NewEnemyTag>(newEnemyEntity);
        }
        ecb.Playback(state.EntityManager);
        ecb.Dispose();
    }
}
近くのプレイヤーを追従する
一番近いプレイヤーを探す
各プレイヤーの中で、その敵の一番近くにいるプレイヤーを狙って追従するようにするため、一番近いプレイヤーの位置を探すシステム「EnemyTargetingSystem」を作成しました。
これはサーバーワールドのみで実行し、各クライアントのエネミーへ値を同期しています。将来的には、数百のエンティティが生成されるのでジョブシステムで実装してみました。
using Unity.Burst;
using Unity.Collections;
using Unity.Entities;
using Unity.Mathematics;
using Unity.Transforms;

[WorldSystemFilter(WorldSystemFilterFlags.ServerSimulation)]
public partial struct EnemyTargetingSystem : ISystem
{
    public void OnCreate(ref SystemState state)
    {
        state.RequireForUpdate<PlayerTag>();
        state.RequireForUpdate<TargetPosition>();
    }

    [BurstCompile]
    public void OnUpdate(ref SystemState state)
    {
        // ジョブに渡すプレイヤー位置のリストを作成
        var playerPositions = new NativeList<float3>(Allocator.TempJob);

        // PlayerTag を持つエンティティの位置を取得
        foreach (var transform in SystemAPI.Query<LocalTransform>().WithAll<PlayerTag>())
        {
            playerPositions.Add(transform.Position);
        }

        if (playerPositions.Length == 0)
        {
            return;
        }

        // TargetPosition を更新するジョブをスケジュール
        var job = new UpdateTarget
        {
            PlayerPositions = playerPositions
        };
        job.ScheduleParallel(state.Dependency).Complete();

        playerPositions.Dispose();
    }

    [BurstCompile]
    public partial struct UpdateTarget : IJobEntity
    {
        // マルチスレッドで実行するため、NativeListはReadOnly指定
        [ReadOnly] public NativeList<float3> PlayerPositions;

        private void Execute(ref TargetPosition targetPosition, in LocalTransform transform)
        {
            float3 closestPosition = transform.Position;
            float closestSqrDistance = float.MaxValue;

            // 各プレイヤーとエネミー間の距離を算出し、一番近いプレイヤーの位置を探す
            foreach (var playerPosition in PlayerPositions)
            {
                var sqrDistance = math.distancesq(transform.Position, playerPosition);
                if (sqrDistance < closestSqrDistance)
                {
                    closestSqrDistance = sqrDistance;
                    closestPosition = playerPosition;
                }
            }
            // 一番近いプレイヤーの位置をセット
            targetPosition.position = closestPosition;
        }
    }
}
敵を追従させる
セットした移動位置に向けて各エネミーを移動させるシステム「EnemyMoveSystem」を作成しました。こちらもジョブシステムで実装しています。
using Unity.Burst;
using Unity.Entities;
using Unity.Mathematics;
using Unity.NetCode;
using Unity.Transforms;

[UpdateInGroup(typeof(PredictedSimulationSystemGroup))]
[UpdateBefore(typeof(PlayerMoveSystem))]
[BurstCompile]
public partial struct EnemyMoveSystem : ISystem
{
    public void OnCreate(ref SystemState state)
    {
        state.RequireForUpdate<EnemyTag>();
        state.RequireForUpdate<TargetPosition>();
    }

    [BurstCompile]
    public void OnUpdate(ref SystemState state)
    {
        var deltaTime = SystemAPI.Time.DeltaTime;

        new EnemyMoveJob
        {
            DeltaTime = deltaTime
        }.ScheduleParallel();
    }

    [BurstCompile]
    public partial struct EnemyMoveJob : IJobEntity
    {
        public float DeltaTime;

        private void Execute(ref LocalTransform transform, in TargetPosition targetPosition, in CommonStatus commonStatus, in Simulate _)
        {
            // ターゲットへの向き(単位ベクトル)を算出
            float3 direction = math.normalize(targetPosition.position - transform.Position);
            // 位置を更新
            transform.Position += direction * commonStatus.MoveSpeed * DeltaTime;
        }
    }
}
動作確認
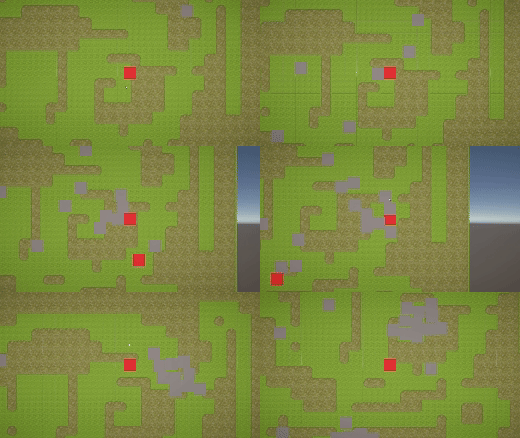
ビルドしてマルチプレイの動作確認をしてみると、徐々に敵(灰色の四角)が増えて近い方のプレイヤー(赤色の四角)に寄って行ってます!ただ、画面内で敵がスポーンしているのでこれはなかなか理不尽ですね…笑

まとめ
いやー、ChatGPT先生が優秀ですね!
情報の精査と少々の修正は必要ですが、ある程度の情報が素早く手に入るので普段の仕事でもそうですが非常に重宝しています。今回は特に答えがある中での実装ではなかったので苦戦しながらも想定通りの動きを実現できたので、自分とAIの成長をめちゃくちゃ感じました!
さて次回ですが、戦闘システムの武器を実装して敵を倒せるようにしていこうと思っています!


