
はじめに
マインクラフトのMOD制作をしようと思い至り、学習を進めています。
備忘録としてこちらに記事をまとめていきます。
前提
開発環境
- Windows 11 64bit
- Minecraft 1.21(1.21.1にも対応)
- Java 21
- NeoForge 21.0.167
記事のまとめ方
- Javaなどのプログラミングに関する解説は基本なし。
- コードのコメントに軽い説明を記載。
参考動画
JDK(Java Development Kit)のインストール
以下のURLからインストーラーをダウンロード
https://adoptium.net/temurin/releases?packeage=jdk&version=21&os=windows&arch=x64&mode=filter
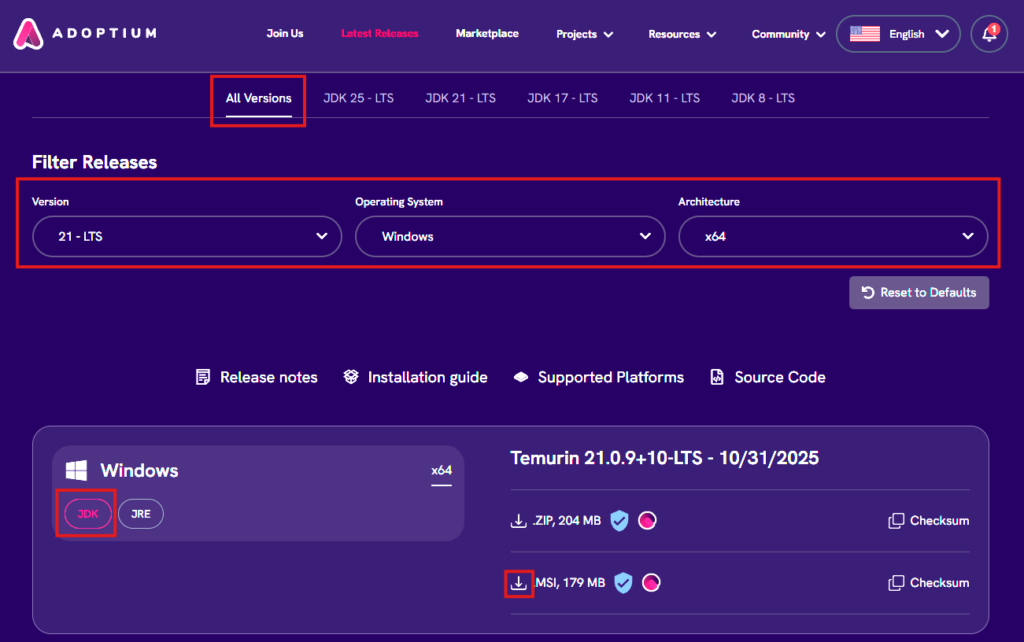
注)インストール時に以下の画面で「Set JAVA_HOME variable」を「ローカルハードドライブにインストール」に変更すること。

統合開発環境(IDE)のインストール
今回使用するのは、IntelliJ Idea。Eclipseも推奨されているようです。
以下のURLからインストーラーをダウンロード。
https://www.jetbrains.com/ja-jp/idea/download/?section=windows
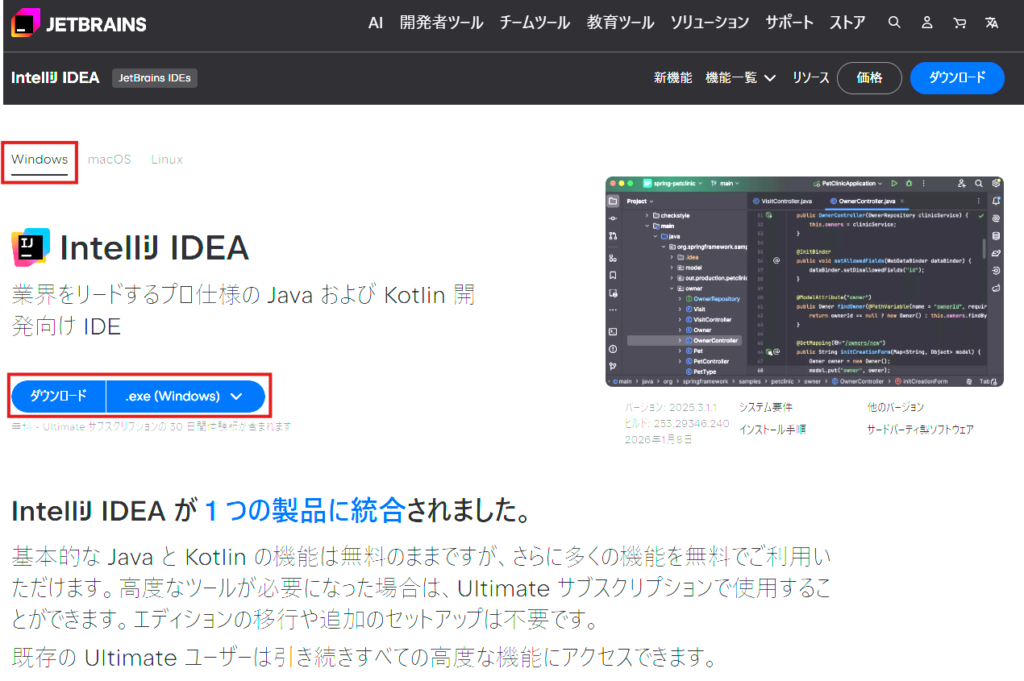
ダウンロードしたexeファイルを実行して、インストール。(設定変更は特に必要なさそう)
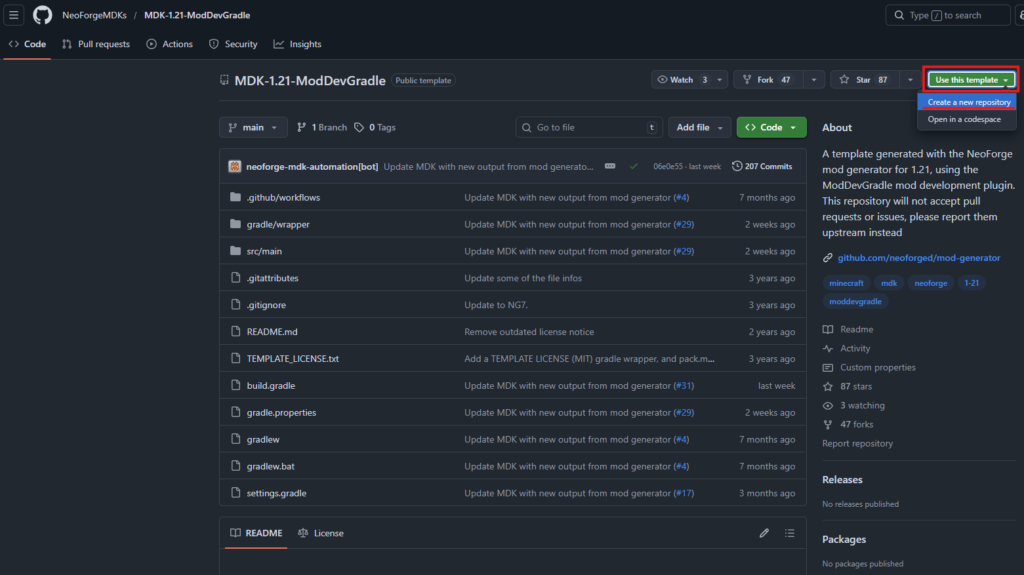
NeoForgeのテンプレートプロジェクトを取得
以下のURLからダウンロード。※Githubアカウントが必要です。
https://github.com/NeoForgeMDKs/MDK-1.21-ModDevGradle
他のバージョンで開発する場合には、以下のURLから末尾が「ModDevGradle」のものを探す。
https://github.com/orgs/NeoForgeMDKs/repositories?

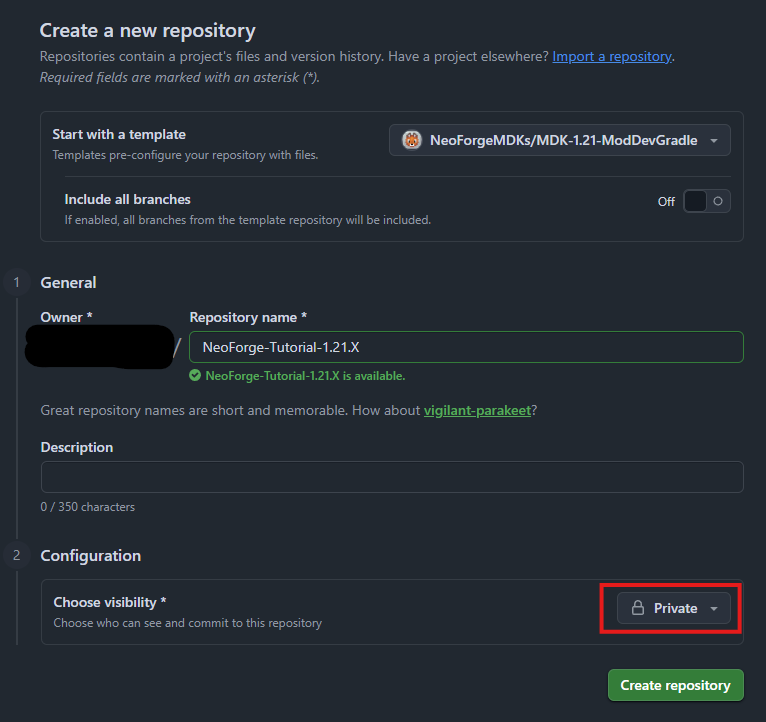
このテンプレートを使って、自分のアカウントにリポジトリを作成します。
Repository name:任意の名前(今回はNeoForge-Tutorial-1.21.X)
Choose visibility:Private(非公開)→ ページ公開のためPublicにしました。
作成されたリポジトリのURLをコピー
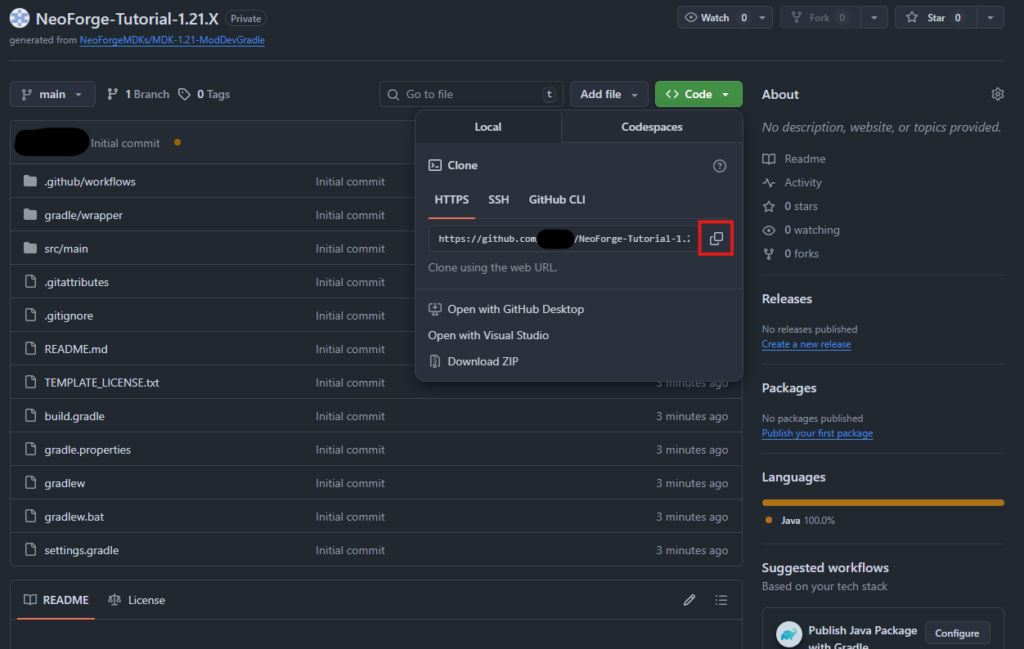
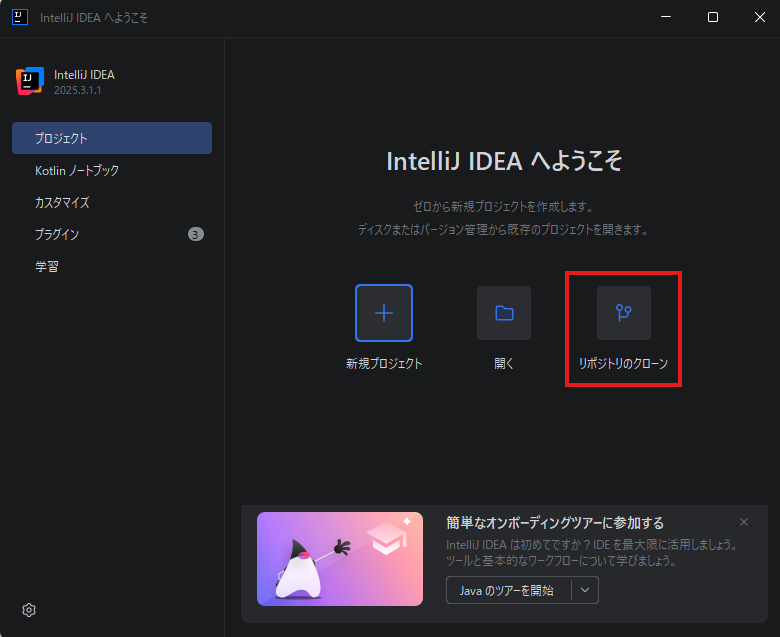
先ほどインストールしたIntelliJ Ideaを開き、リポジトリのクローン。
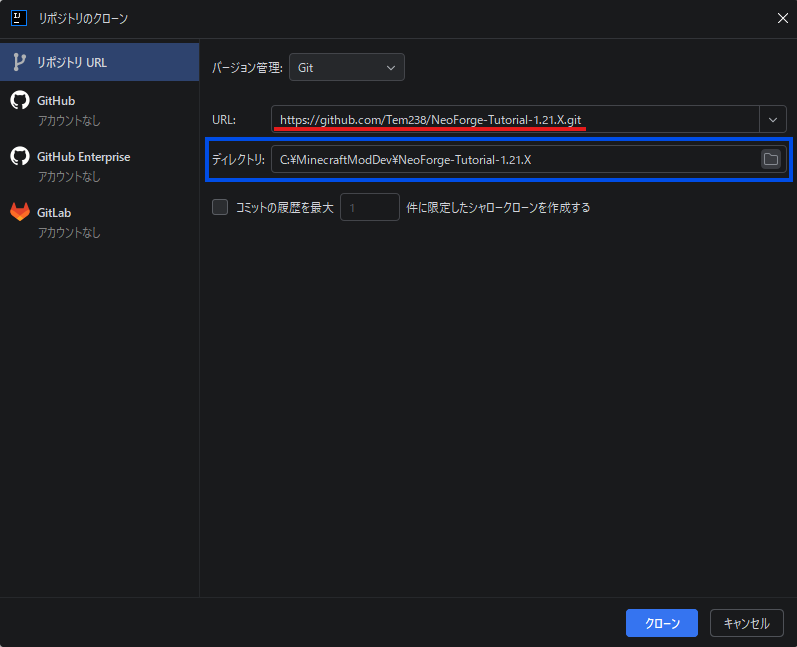
コピーしたリポジトリのURLを赤線の部分に張り付けてクローン。
(プロジェクトの保存先を変えたい場合には青枠でフォルダーを選ぶ)
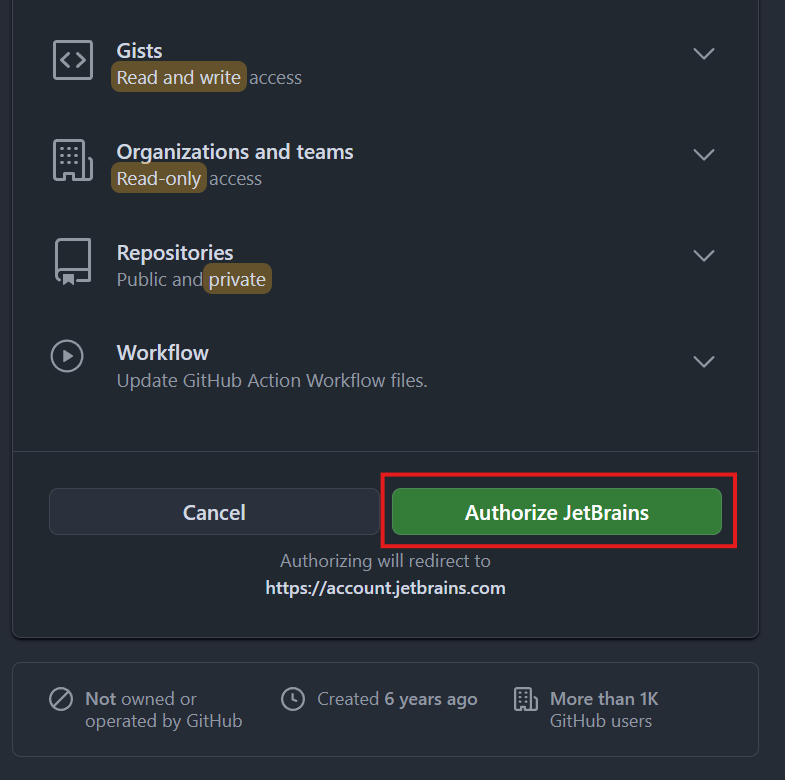
GitHubと連携していない場合には、ログインして最終的に以下の画面で連携を完了させる。
以下の警告が出るので、プロジェクトを信頼。

自動でビルドが開始され、数分で完了します。
この間に、操作しやすいように以下3つの設定のチェックを外しておきます。(必須ではないけど推奨)
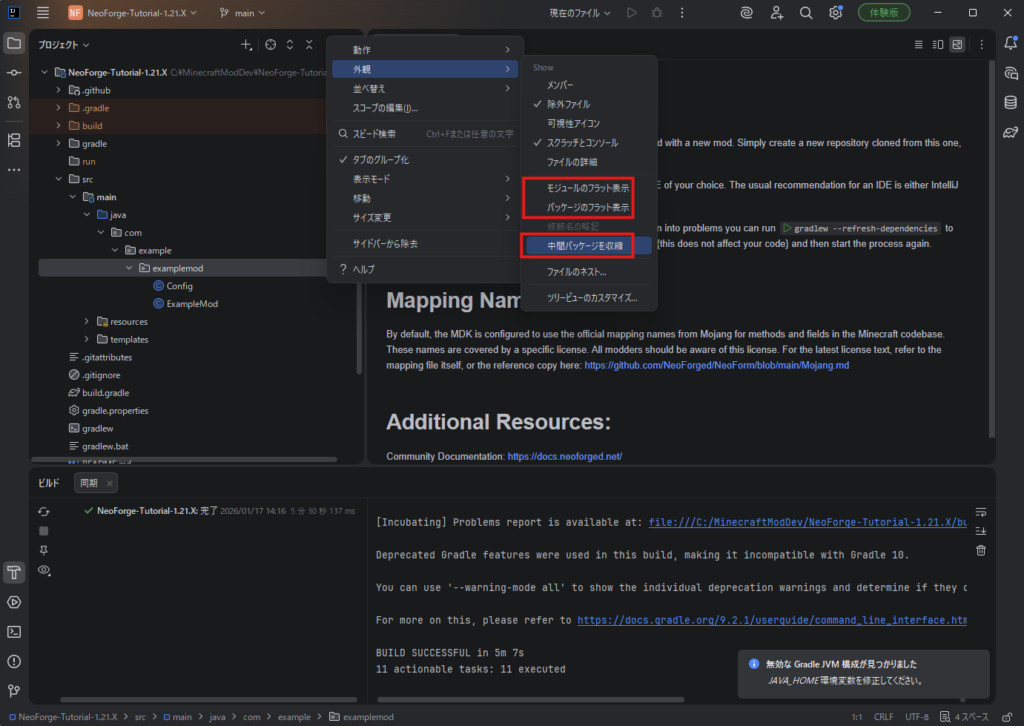
ビルドが失敗する場合に確認する設定+
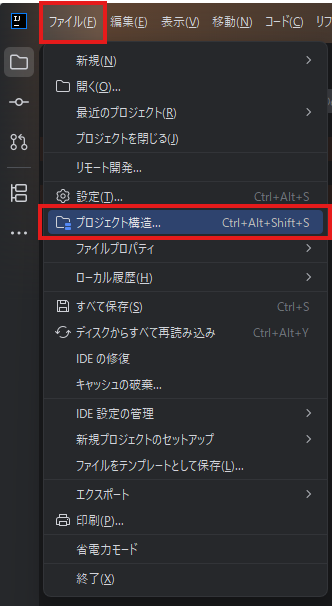
プロジェクトのSDKの確認
左上のファイルからプロジェクト構造の設定画面を開く
SDKが以下のようにJava21となっているか確認。

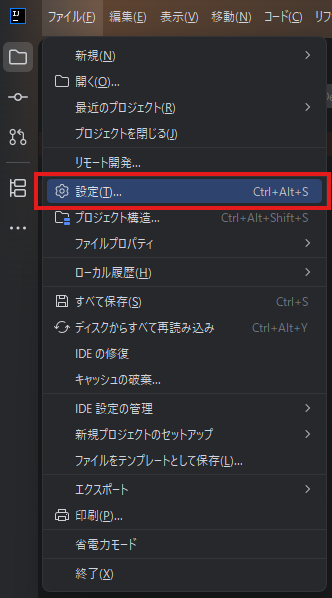
Gradle設定の確認
左上のファイルから設定画面を開く。
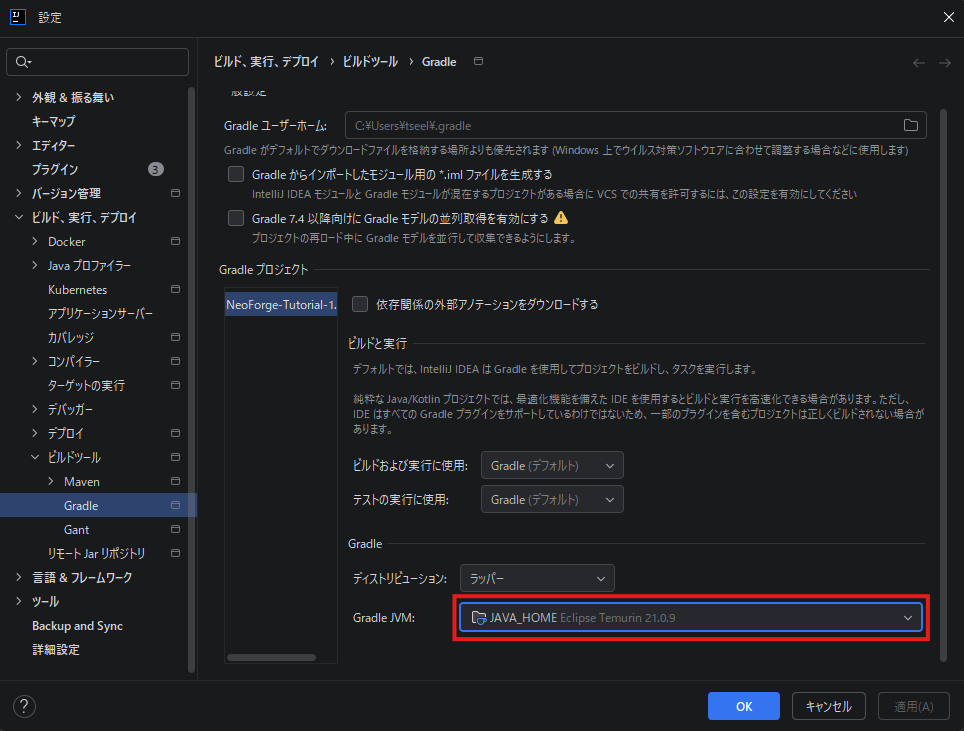
「ビルド、実行、デプロイ」-「ビルドツール」-「Gradle」の画面でGradle JVMを確認。
JAVA_HOMEが選択されており、インストールしたJDKのバージョンが表示されていればOKなはず。
ここで表示されない場合には、IntelliJ Ideaを再起動するか、JDKのインストールからやり直そう。
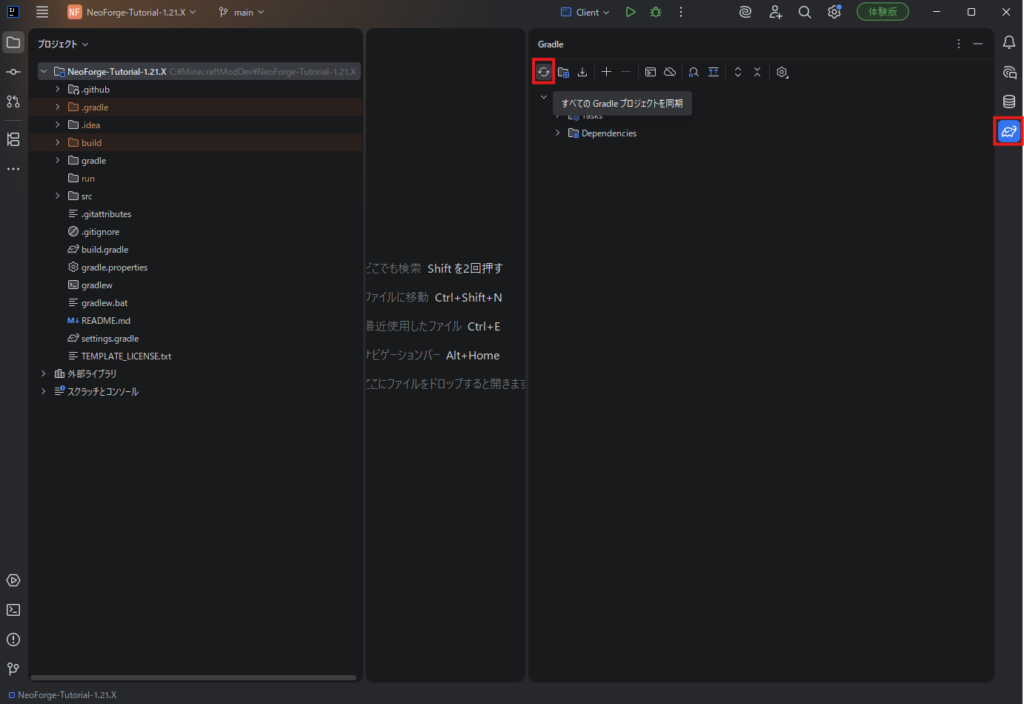
Gradleプロジェクトのリロード。
テンプレートのコードを自作MOD用に修正
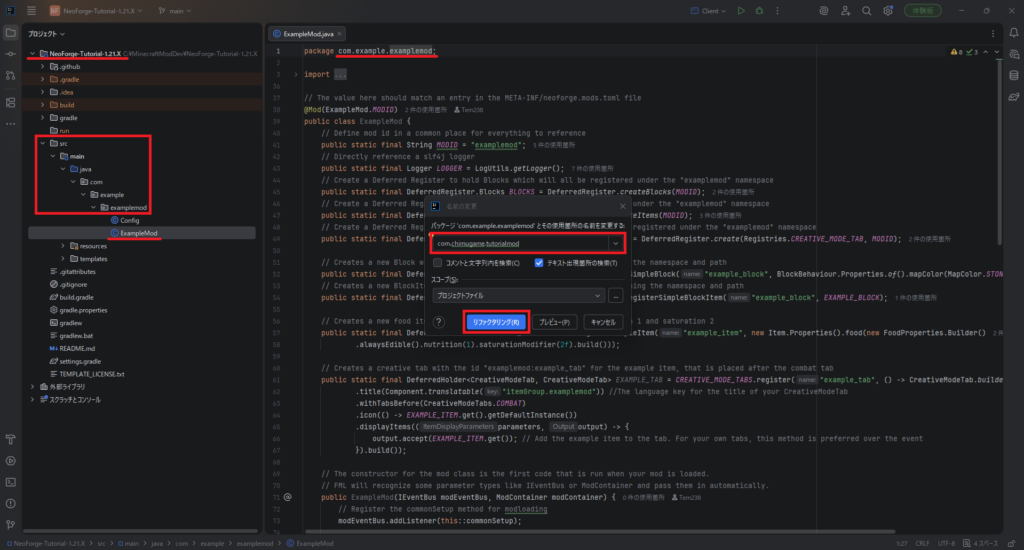
ExampleModファイルを開き、package名をリファクタリング(Shift+F6)する。
命名は任意だが、他のMODと被らないような名前が良いっぽい。
一般的にドメイン名などを使うことが多いみたい?
例)com.chimugame.tutorialmod
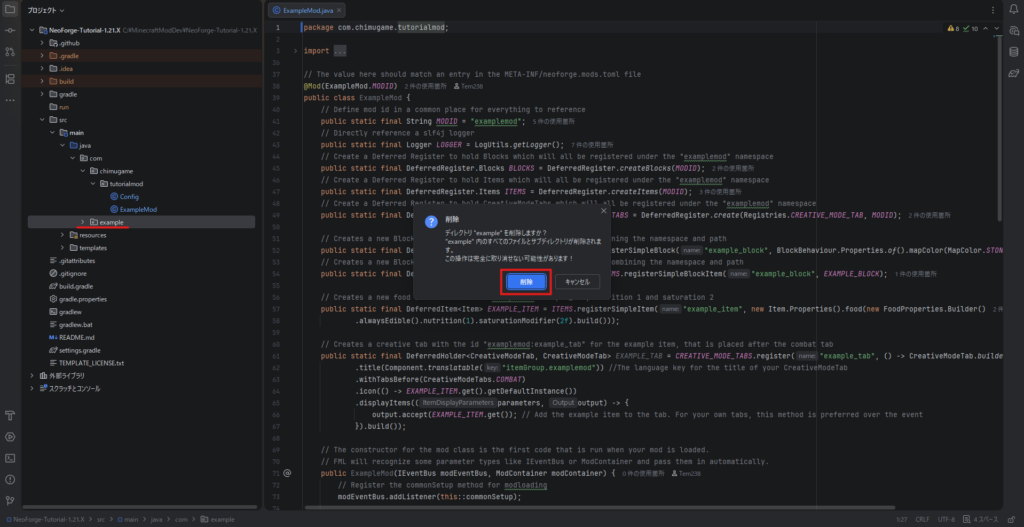
元のexampleフォルダは必要ないので削除(Deleteキー)
Tutorial.javaファイルのクラス名を「TutorialMod」にリファクタリング(Shift+F6)
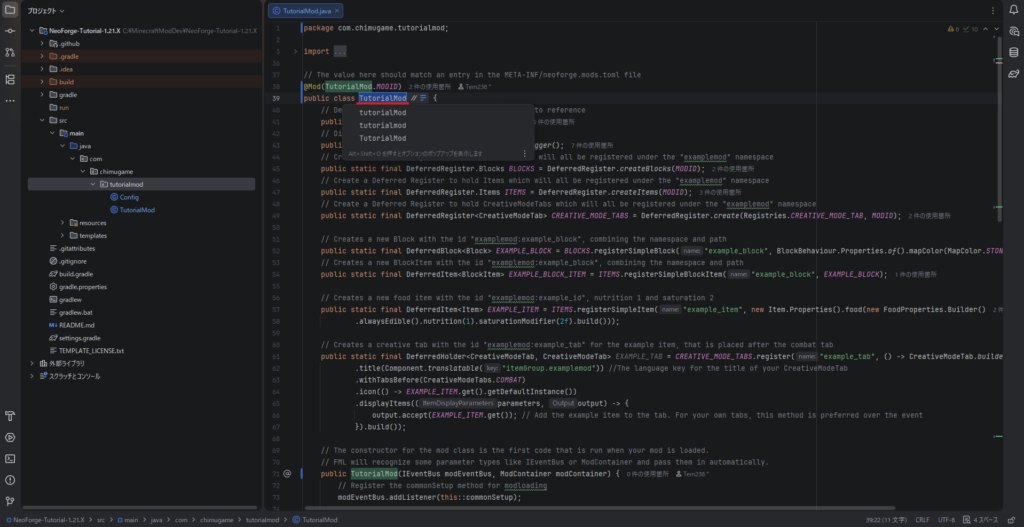
- 変数「MODID」を「MOD_ID」にリファクタリング
- テンプレートの追加アイテム、ブロックの部分を削除、またはコメントアウト
package com.chimugame.tutorialmod;

...(中略)

// The value here should match an entry in the META-INF/neoforge.mods.toml file
@Mod(TutorialMod.MOD_ID)
public class TutorialMod {
    // Define mod id in a common place for everything to reference
    public static final String MOD_ID = "tutorialmod";
    // Directly reference a slf4j logger
    public static final Logger LOGGER = LogUtils.getLogger();
    /*// Create a Deferred Register to hold Blocks which will all be registered under the "examplemod" namespace
    public static final DeferredRegister.Blocks BLOCKS = DeferredRegister.createBlocks(MOD_ID);
    // Create a Deferred Register to hold Items which will all be registered under the "examplemod" namespace
    public static final DeferredRegister.Items ITEMS = DeferredRegister.createItems(MOD_ID);
    // Create a Deferred Register to hold CreativeModeTabs which will all be registered under the "examplemod" namespace
    public static final DeferredRegister<CreativeModeTab> CREATIVE_MODE_TABS = DeferredRegister.create(Registries.CREATIVE_MODE_TAB, MOD_ID);

    // Creates a new Block with the id "examplemod:example_block", combining the namespace and path
    public static final DeferredBlock<Block> EXAMPLE_BLOCK = BLOCKS.registerSimpleBlock("example_block", BlockBehaviour.Properties.of().mapColor(MapColor.STONE));
    // Creates a new BlockItem with the id "examplemod:example_block", combining the namespace and path
    public static final DeferredItem<BlockItem> EXAMPLE_BLOCK_ITEM = ITEMS.registerSimpleBlockItem("example_block", EXAMPLE_BLOCK);

    // Creates a new food item with the id "examplemod:example_id", nutrition 1 and saturation 2
    public static final DeferredItem<Item> EXAMPLE_ITEM = ITEMS.registerSimpleItem("example_item", new Item.Properties().food(new FoodProperties.Builder()
            .alwaysEdible().nutrition(1).saturationModifier(2f).build()));

    // Creates a creative tab with the id "examplemod:example_tab" for the example item, that is placed after the combat tab
    public static final DeferredHolder<CreativeModeTab, CreativeModeTab> EXAMPLE_TAB = CREATIVE_MODE_TABS.register("example_tab", () -> CreativeModeTab.builder()
            .title(Component.translatable("itemGroup.examplemod")) //The language key for the title of your CreativeModeTab
            .withTabsBefore(CreativeModeTabs.COMBAT)
            .icon(() -> EXAMPLE_ITEM.get().getDefaultInstance())
            .displayItems((parameters, output) -> {
                output.accept(EXAMPLE_ITEM.get()); // Add the example item to the tab. For your own tabs, this method is preferred over the event
            }).build());*/

    // The constructor for the mod class is the first code that is run when your mod is loaded.
    // FML will recognize some parameter types like IEventBus or ModContainer and pass them in automatically.
    public TutorialMod(IEventBus modEventBus, ModContainer modContainer) {
        // Register the commonSetup method for modloading
        modEventBus.addListener(this::commonSetup);

        /*// Register the Deferred Register to the mod event bus so blocks get registered
        BLOCKS.register(modEventBus);
        // Register the Deferred Register to the mod event bus so items get registered
        ITEMS.register(modEventBus);
        // Register the Deferred Register to the mod event bus so tabs get registered
        CREATIVE_MODE_TABS.register(modEventBus);*/

        // Register ourselves for server and other game events we are interested in.
        // Note that this is necessary if and only if we want *this* class (ExampleMod) to respond directly to events.
        // Do not add this line if there are no @SubscribeEvent-annotated functions in this class, like onServerStarting() below.
        NeoForge.EVENT_BUS.register(this);

        // Register the item to a creative tab
        modEventBus.addListener(this::addCreative);

        // Register our mod's ModConfigSpec so that FML can create and load the config file for us
        modContainer.registerConfig(ModConfig.Type.COMMON, Config.SPEC);
    }

    private void commonSetup(FMLCommonSetupEvent event) {
        // Some common setup code
        LOGGER.info("HELLO FROM COMMON SETUP");

        if (Config.LOG_DIRT_BLOCK.getAsBoolean()) {
            LOGGER.info("DIRT BLOCK >> {}", BuiltInRegistries.BLOCK.getKey(Blocks.DIRT));
        }

        LOGGER.info("{}{}", Config.MAGIC_NUMBER_INTRODUCTION.get(), Config.MAGIC_NUMBER.getAsInt());

        Config.ITEM_STRINGS.get().forEach((item) -> LOGGER.info("ITEM >> {}", item));
    }

    // Add the example block item to the building blocks tab
    private void addCreative(BuildCreativeModeTabContentsEvent event) {
        /*if (event.getTabKey() == CreativeModeTabs.BUILDING_BLOCKS) {
            event.accept(EXAMPLE_BLOCK_ITEM);
        }*/
    }

    // You can use SubscribeEvent and let the Event Bus discover methods to call
    @SubscribeEvent
    public void onServerStarting(ServerStartingEvent event) {
        // Do something when the server starts
        LOGGER.info("HELLO from server starting");
    }

    // You can use EventBusSubscriber to automatically register all static methods in the class annotated with @SubscribeEvent
    @EventBusSubscriber(modid = TutorialMod.MOD_ID, bus = EventBusSubscriber.Bus.MOD, value = Dist.CLIENT)
    static class ClientModEvents {
        @SubscribeEvent
        static void onClientSetup(FMLClientSetupEvent event) {
            // Some client setup code
            LOGGER.info("HELLO FROM CLIENT SETUP");
            LOGGER.info("MINECRAFT NAME >> {}", Minecraft.getInstance().getUser().getName());
        }
    }
}
※エラーになっている箇所も一緒にコメントアウトしています。(全て削除でOKです)
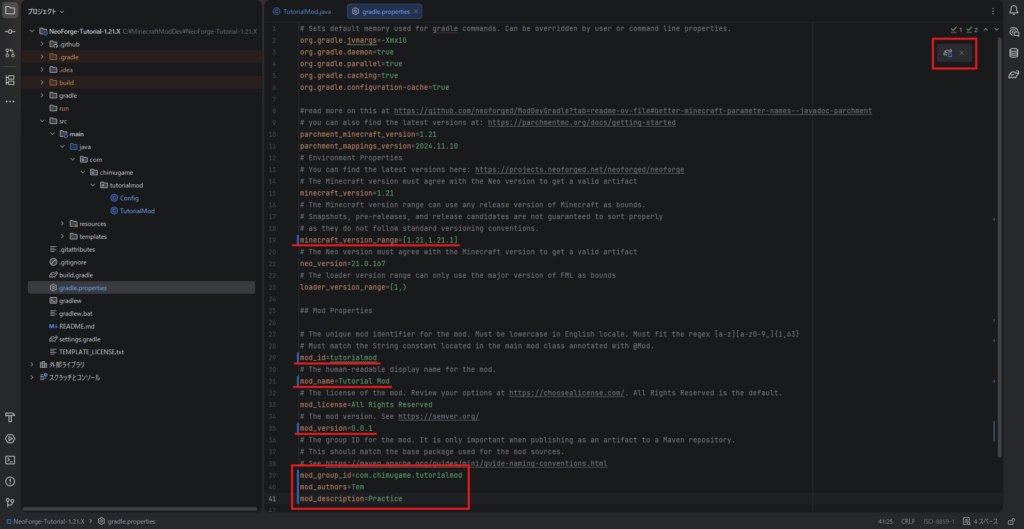
gradle.propertiesを修正し、Gradleのリロード
※GitHubのソースは自由に使っていただいて構いませんので、MITライセンスに変更
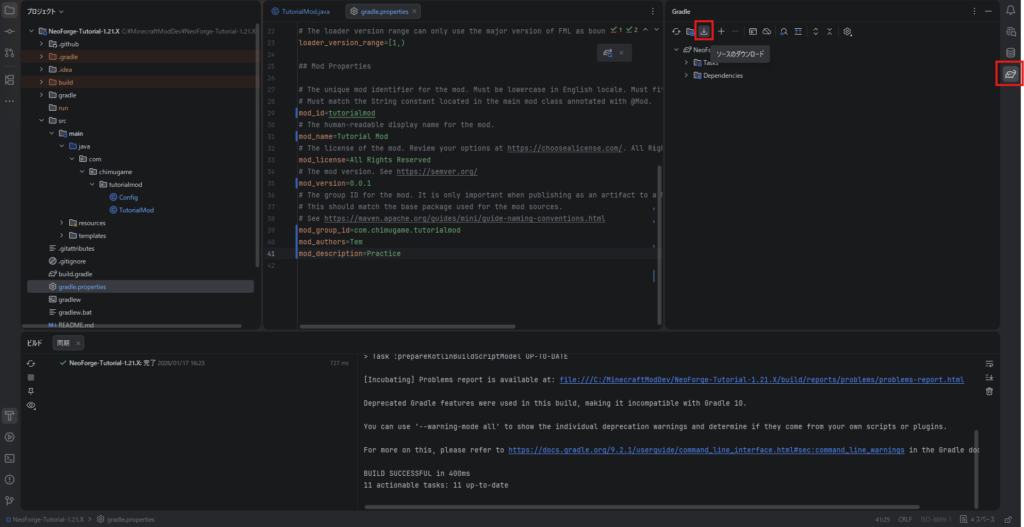
Gradleのタブから「ソースのダウンロード」
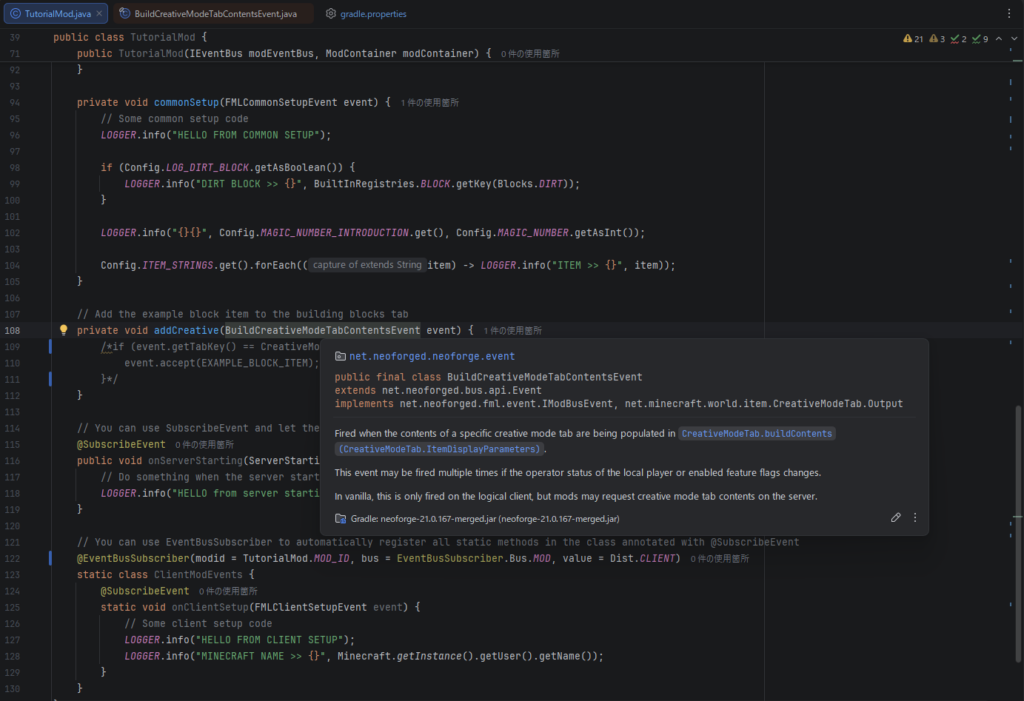
TutorialMod.javaファイルの以下の部分から、BuildCreativeModeTabContentsEventクラスに飛ぶ(カーソルを合わせてCtrl+左クリック)
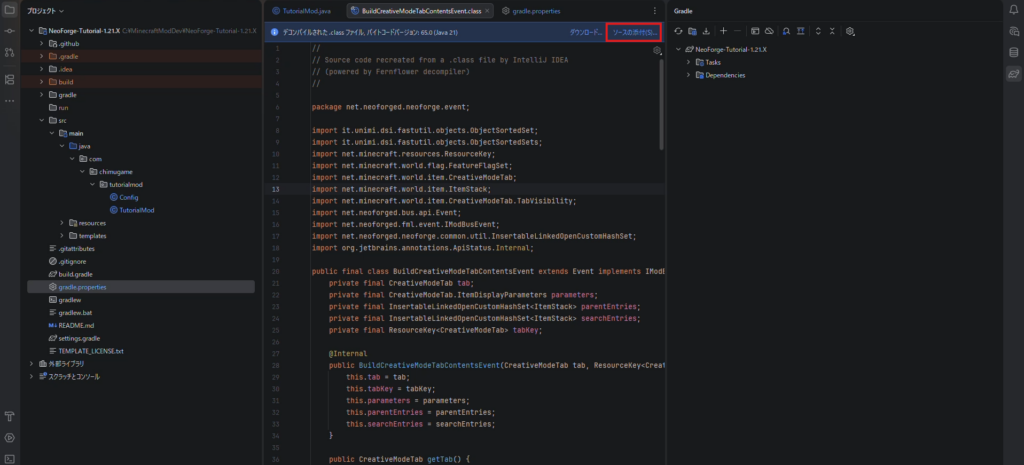
青いメッセージバーが表示されているはずなので、「ソースの添付」を押下
動作確認
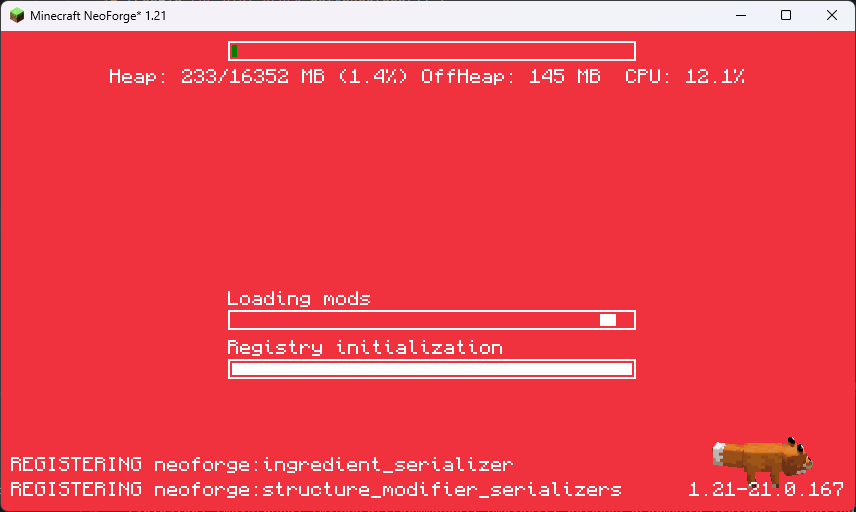
上部のメニューからClientの実行

しばらくして、いつものNeoForgeのロード画面からマイクラが立ち上がれば成功です!
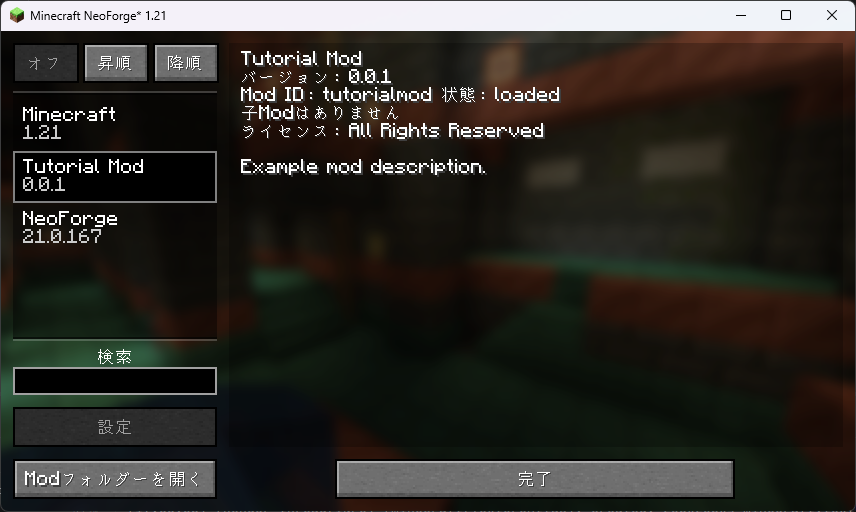
導入MODの確認画面で実装したMOD名があるか確認しよう。
(制作者名とMOD説明はgradle.propertiesでは変更できなくなった?わかったら追記します)
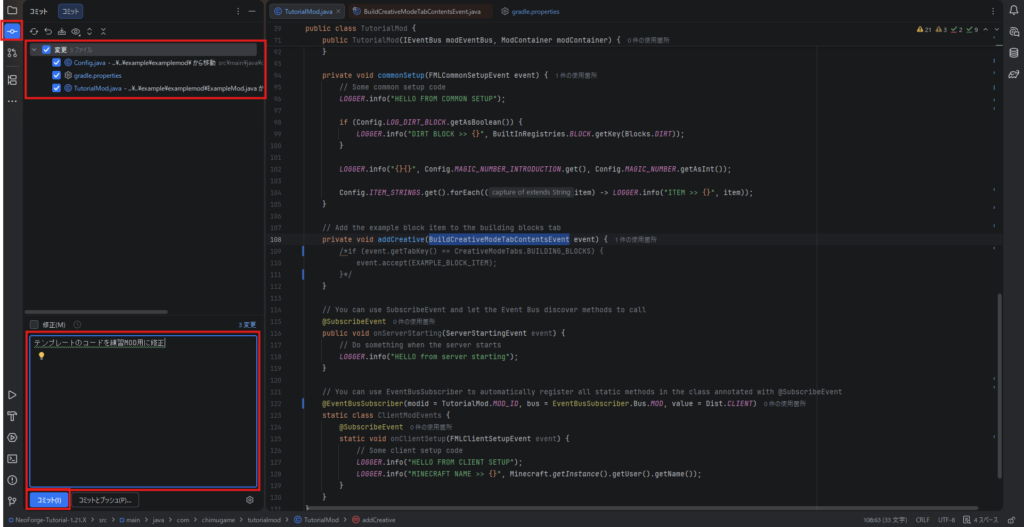
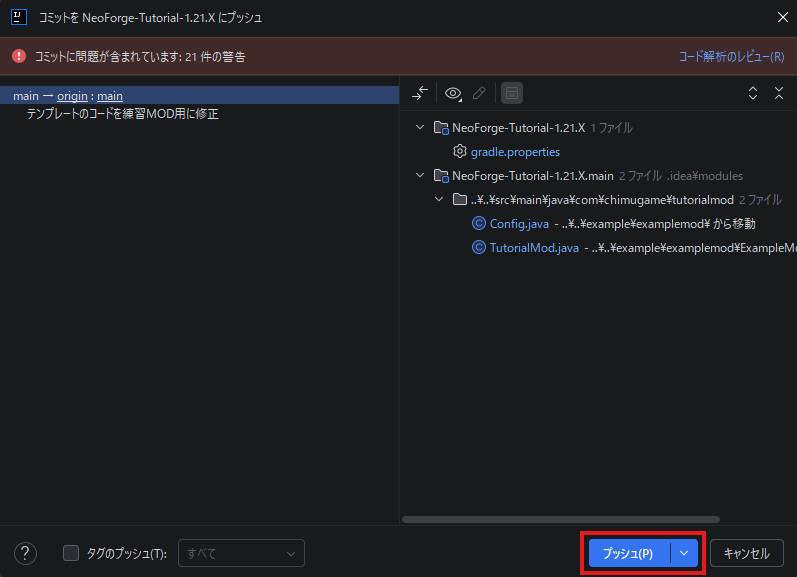
GitHubへコミット、プッシュ
以下のように変更をコミットする。
上部のメニューからプッシュ(そのままプッシュするならコミットとプッシュ)
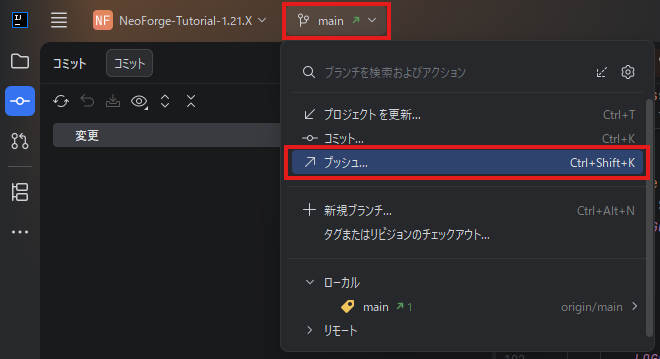
多くの警告がありますが、基本的には気にしなくてもいいです。
自分のGitHubページを開いて、更新されているか確認
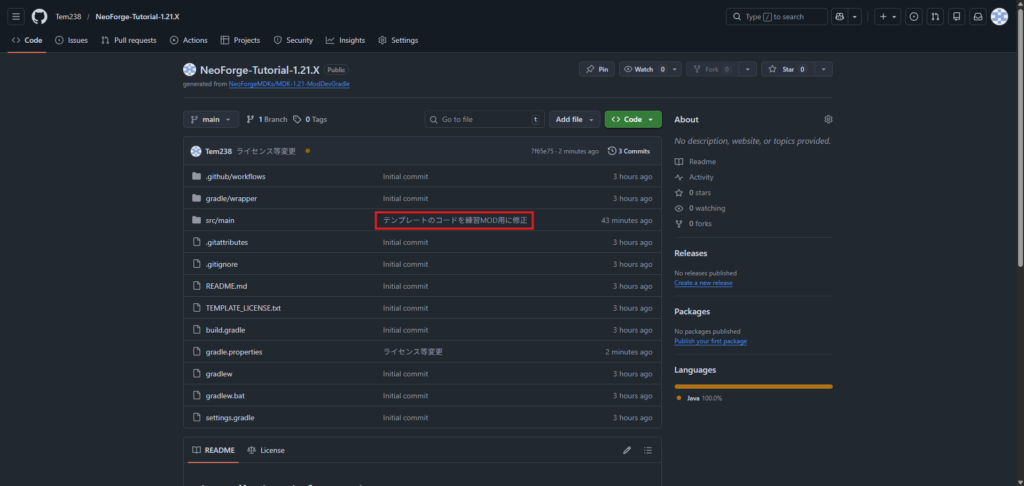
参考に私のGitHubページを添付しておきます。自由に使用していただいて構いません。
https://github.com/Tem238/NeoForge-Tutorial-1.21.X